Subscribe to our YouTube channel to get how-to videos and other helpful information regarding lawn sprinkler system maintenance and repair.
Video Transcript
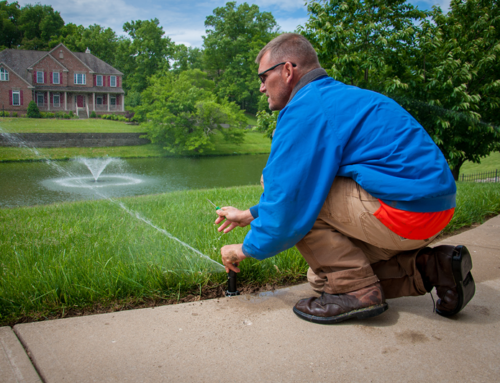
Hi! I’m Sean Mullarkey with TriState Water Works: your professional and prompt lawn sprinkler service and repair company.
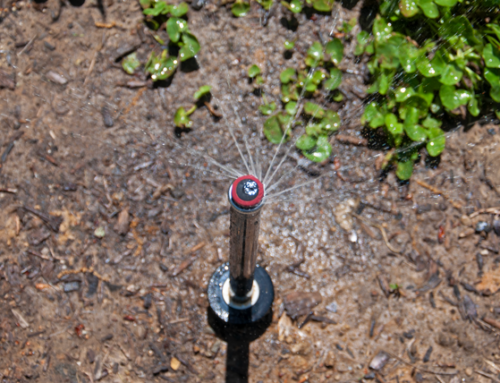
Today I’d like to show you how you can replace a lawn sprinkler that’s gone bad. You might ask, “What happens to them? Why do they go bad”? Well, as they get older they wear out. One of the major areas they wear out if right here at the wiper shield. So if your sprinklers running and you go up and look at it closely and you see water bubbling up out of the ground, probably should replace it. Other things that happen to lawn sprinklers are lawn aerators.
So if you have your lawn aerated, good chance that you might get holes poked in the top of your sprinkler from the lawn aerator. Another problem that can happen is if they get frozen and there’s water still in them, the case can crack.
So, this is a Do-It-Yourself job. You can do this yourself or can call us and we would be more than glad to come out and fix it in a prompt, professional manner for you. So let’s take a look at how we replace one of these sprinklers.
This is a sprinkler that needs to be replaced. So, the sprinkler would be the center of my hole. I want to dig a hole that the radius is the same size as the sprinkler I’m going to use to replace it. So basically I need to come out this far from the sprinkler and just work my way around, dig up the sprinkler and replace it.
This is the best type of shovel to use. A little rounded nose spade works real well is cutting out the side and developing a nice round hole. So, using the sprinkler as our measuring stick, (pause) we slowly work our way around the sprinkler head (pause), cutting out the side (pause), and digging up the sprinkler. Now I use my spade as like a pry bar and pry up the side and soil. Next, I’ll just use my hands to pull that up and there we have an exposed sprinkler head.
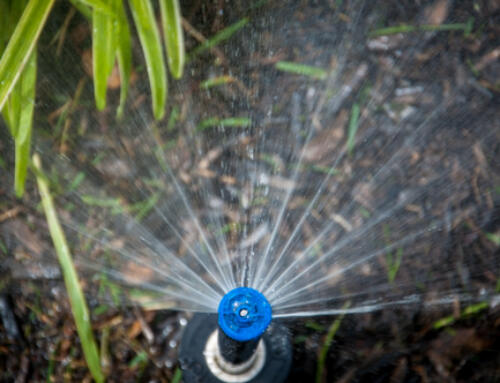
If you look at the sprinkler we haven’t installed yet, you’ll notice at the base are female pipe threads. That is where we will screw it on to the existing pipes for the lawn sprinklers. First, we need to remove the old. Simply take the sprinkler in your hand, turn it counterclockwise to remove the sprinkler. Once it comes unscrewed, set it aside, take your new sprinkler head (pause) and screw it onto the pipe.
It’s important that the sprinkler lines up with the hole that’s in the sod. So gently and easily, guide the sprinkler head back down into the sod, then take your feet and step the sod down to make it nice and smooth and level.
One last thing we need to do is replace the nozzle. Here’s a nozzle we’re going to put back into the new sprinkler body. Simply pull up the sprinkler, unscrew the flesh cap, drop your new nozzle into the sprinkler, twist it on until it stops turning.
See how simple that was to replace a sprinkler head? Some of the benefits of doing that too: you’re gonna save water and you’re also have better and healthier looking plants and lawn. So if you need us to come out and take care of that, please call TriState Water Works: your prompt and professional lawn sprinkler service and repair company.


![[VIDEO] TriState Water Works Core Value: Integrity](https://www.tristatewaterworks.com/wp-content/uploads/Screen-Shot-2021-12-01-at-3.25.06-PM-500x383.png)
![[VIDEO] TriState Water Works Core Value: Customer-Centric](https://www.tristatewaterworks.com/wp-content/uploads/Screen-Shot-2021-11-01-at-2.46.18-PM-500x383.png)
![[VIDEO] Irrigation System Parts We Recommend](https://www.tristatewaterworks.com/wp-content/uploads/Screen-Shot-2021-10-04-at-1.04.31-PM-500x383.png)
![[VIDEO] TriState Water Works Core Value: Teamwork](https://www.tristatewaterworks.com/wp-content/uploads/Screen-Shot-2021-09-02-at-1.31.53-PM-500x383.png)

![[VIDEO] Core Value: Unceasing Improvement](https://www.tristatewaterworks.com/wp-content/uploads/Screen-Shot-2021-01-18-at-1.44.26-PM-500x383.png)
Leave A Comment